 Skip to content

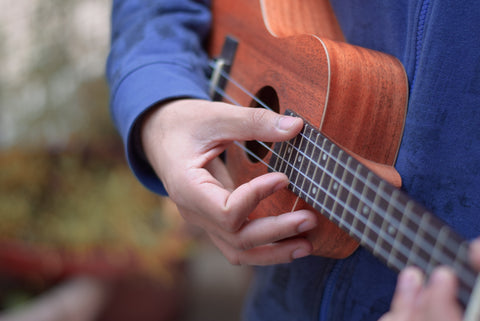
Photo Credit: Richa Sherma
First things first. What is fingerpicking?
Instead of merely fretting chords and strumming, sometimes a more delicate sound is desired. Fingerpicking can be added at the end of musical phrases to add dynamics and flair, or an entire song can be fingerpicked. Fingerpicking is accomplished by using your fingers to pluck individual notes rather than dragging a finger across all of the strings to strum simultaneously.
How Many Fingers Should I Use?
Depending on where you look, the answer can vary quite a bit! I prefer a three or four fingered method as it gives me the most options and speed, but using three or four fingers can be tough in the beginning, so feel free to adopt a two fingered method using just your thumb and index finger if need be. In this method the thumb controls the G and C strings the the index finger controls the E and A strings.
Before you start, check out these tips:
- Make sure you are comfortable and not creating tension in the arm, neck, or shoulder. You should be either seated and/or using a strap so you can concentrate on what you are doing and not on your ukulele sliding. Anchor your arm by lightly pressing the middle of your lower arm to the base of your ukulele. Pinky anchoring is optional if it makes you more comfortable, but it will limit the use of your ring finger and shouldn’t be relied on as you progress.
- Commit to one picking pattern first and make sure you feel comfortable before moving on to the next one. Remember that mastering one pattern will make others easier.
- Start first by just concentrating on the picking hand. Once you feel comfortable, try adding some chords, then add chord changes. Build up the difficulty slowly to avoid frustration.
- To get a good sound, make sure you are squeezing the strings as you pluck - don’t stab at them. They should ring out clearly.
- Try to use your thumb, index, and middle fingers, and not just one finger. If you are struggling with using three or four fingers, try the two finger picking style method of just your thumb and index fingers.
- As you practice these patterns, try counting to yourself so you play an even tempo and keep time. You can use a metronome if it helps you.
First Pattern - The Forward Roll (triplet - 3/4 time signature)
Play this on open strings first without fretting any chords. Your thumb should pluck the G string, then index finger should pluck the E string, then middle should pluck the A string.
A————0——0——0——0——0——0——0———————————————
E———0——0——0——0——0——0——0———————————————-
C———————————————————————————————————
G——0——0——0——0——0——0——0————————————————-
Next, play this while fretting a C chord.
A———3——3——3——3——3——3——3———————————————-
E——0——0——0——0——0——0——0————————————————-
C———————————————————————————————————
G—0——0——0——0——0——0——0—————————————————-
Next, we are going to try to change chords while using the same progression. The chords are listed above the notation.
C F C
A--------3-------3-----3-----3------0-----0------0-----0---------3----3----3----3----
E------0-------0-----0-----0------1-----1------1-----1--------0-----0----0----0------
C------------------------------------------------------------------------------------------
G--0-------0-----0------0-----2------2------2------2-------0-----0----0----0---------
Try using this pattern to play another song in a 3/4 time signature, such as: My Favorite Things (Sound of Music), Rainbow Connection (The Muppets), The Times They are A Changing (Bob Dylan, or America (Simon and Garfunkel).
Check out Melissa's video on how to execute this fingerpicking style:
Second Pattern - The Forward Roll (4/4 time signature)
Now we are going to attempt to use all four fingers and try to hover over the strings.
Play this on open strings first without fretting any chords. Your thumb plucks the G string, index plucks the C string, middle plucks the E string, and your ring finger plucks the A string.
A—————0——0———0———0———-0———0———0———0----
E————0——-0———0———0———0———0———0———0------
C———0——-0———0———0———0———0———0———0--------
G——0——-0———0———0———0———0———0———0-----------
Next, we are going to play this pattern while fretting a open D chord.
D
A—————0———0———0———0———0———0———0———0---
E————3———3———3———3———3———3———3———3-----
C———3———3———3———3———3———3———3———3-------
G——3———3———-3———3———3———3———3———3---------
Next we are going to try changing chords while playing this picking pattern.
D A D
A—————0———0———0———0———0———0———0———0——0---0
E————3———3———3———3———0———0———0———0——3—-3-
C———3———3———3———3———1———1———1———1——3——3-
G——3———3———-3———3———2———2———2———2——3——3--
G D A D
A————2———2———0———0———0———0---
E———3———3———3———0———3———3------
C——2———2———3———1———3———3--------
G—0———0———3———2———3———3————3
Here is the accompanying video for this pattern:
This is a great fingerpicking pattern that can be used on many songs. Try it out on Don’t Think Twice, It’s Alright by Bob Dylan. Check out Melissa's fingerpicking tutorial on how to play this song here:
Third Pattern - Forward Reverse Roll
Sounds complicated, but all it means is we are going to pluck the strings starting at the G string in a 1234 then 4321 pattern. See below:
A————0—————0—————0—————0———-
E———0—-0———0—-0———0——0———0—0——-
C——0———0—-0———0—-0————0—-0——-0——
G—0—————0—————0——————0————0—
Check out this video of Melissa demonstrating this technique as well as the fourth and fifth pattern:
Try using this pattern with the song Hallelujah, by Leonard Cohen. You can play along using this video tutorial:
Fourth Pattern - Reverse Roll
Starting with the A string, we are now going to pluck backwards, using our ring, middle, and index finger.
A—0——0——0——0——0——0——0——————
E——0——0——0——0——0——0——0—————
C———0——0——0——0——0——0——0————
G———————————————————————
Fifth Pattern- Melissa’s favorite go to picking pattern
Using just three fingers - thumb, index and middle - try picking this pattern and then adding chords to it. It sounds great even when you aren’t playing a particular song, which is why it is my favorite! It also adds a double fingered squeeze at the front of the pattern, so take note of that.
A[—0——0—- —0——-0——-]--0——-0——--0——--0——]
E[——-0——0———0—---0—]——0—--0———0——--0—]
C[————————————--]—————————————]
G[—0——0——-0——--0——-]-0——--0——-0—-----0------]
There are many more fingerpicking patterns out there, but these will get you started. Once you have mastered them, feel free to mix and match them to the song of your choosing. Maybe write a song of your own using them. Either way, stay relaxed and have fun. The ukulele should make you smile. :)
Questions?
Feel free to send them to Melissa at thehugstrap@gmail.com.
Interested in Ukulele Lessons?
Melissa offers 30 minute virtual lessons via Zoom and Facetime. If interested, email her at thehugstrap@gmail.com.